Resin crafting is an art form that has gained immense popularity in recent years. It allows crafters to create stunning jewelry and home decor items with a unique, glossy finish. Resin crafting is versatile, easy to learn, and can be used to create a wide range of designs. Here we explore the materials needed for resin crafting, the techniques used to create beautiful pieces, how to cure and finish resin projects, and troubleshooting common problems that may arise
What Is Crafting Resin?
Resin is a type of synthetic polymer that is commonly used in crafting to create a wide range of items, including jewelry and home decor items. Resin is a versatile material that can be used in a variety of ways, and it comes in a variety of forms, including liquid and powder.
Crafting resin is a two-part material that consists of a resin component and a hardener component. When these two components are mixed together, a chemical reaction occurs, causing the resin to harden and cure over time. This curing process creates a durable and glossy finish that is ideal for crafting.
One of the main benefits of crafting resin is its versatility. It can be poured into molds to create three-dimensional objects, layered to create interesting patterns and designs, and mixed with pigments to create custom colors. This makes it an excellent choice for creating unique and personalized jewelry pieces or home decor items.
Another benefit of crafting resin is its durability. Once cured, resin creates a hard, glossy finish that is resistant to scratches and can withstand exposure to light and heat. This makes it an excellent choice for creating jewelry pieces that will be worn frequently or home decor items that will be displayed prominently.
There are a variety of different types of resin available for crafting, each with its own set of properties and characteristics. Some types of resin are designed for specific applications, such as casting, while others are more versatile and can be used for a variety of purposes.

Materials Needed for Resin Crafting
Resin crafting is a versatile and creative process that can be used to create a wide range of items, from jewelry to home decor. However, before you start your resin crafting project, it is important to gather all the necessary materials to ensure a successful outcome. Here are some of the materials you will need for resin crafting:
- Resin: Resin is the main component in resin crafting. There are various types of resin available, such as epoxy resin, polyester resin, and polyurethane resin. Each type of resin has its own unique properties, such as cure time, hardness, and clarity.
- Catalyst/Hardener: Catalyst or hardener is a necessary component that is added to resin to initiate the curing process. The catalyst is typically added in a specific ratio to the resin, as specified by the manufacturer.
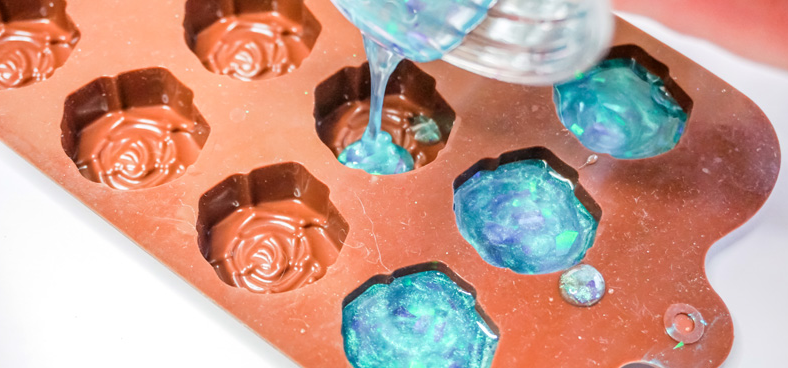
- Molds: Molds are used to give shape to the resin. There are various types of molds available, such as silicone molds, plastic molds, and metal molds. Molds come in a variety of shapes and sizes, and can be used to create a wide range of items.
- Add-ins: Add-ins, such as glitter, pigment, and other materials, can be added to resin to create a custom look. These add-ins can be mixed into the resin before pouring, or sprinkled on top of the resin after pouring to create interesting effects.
- Safety Equipment: It is important to use proper safety equipment when working with resin, such as gloves, a respirator, and eye protection. Resin can release harmful fumes during the curing process, so it is important to work in a well-ventilated area and follow the manufacturer’s instructions carefully.
- Measuring Cups: Accurate measurements are crucial when working with resin. Measuring cups are used to measure the resin and catalyst in the correct ratio before mixing.
- Stir Sticks: Stir sticks are used to mix the resin and catalyst together. It is important to use clean stir sticks for each batch of resin to avoid contamination.

Preparing for Resin Crafting
Preparing for resin crafting is an important step to ensure that your project turns out successful. Here are some key steps to prepare for resin crafting:
- Choosing a Workspace: Resin crafting requires a clean and well-ventilated workspace. Choose a location that is free from dust, debris, and moisture. It is also important to work in an area with good air circulation to prevent harmful fumes from building up.
- Preparing the Molds: Molds should be clean and free from any residue or dust. If using silicone molds, it is a good idea to apply a release agent before pouring the resin to prevent the mold from sticking. The release agent can be applied using a clean brush or spray bottle.
- Mixing the Resin: Accurate measurements are crucial when mixing resin. Use a measuring cup to measure the correct amount of resin and catalyst according to the manufacturer’s instructions. Mix the two components together thoroughly using a clean stir stick.
- Adding Color and Add-Ins: If you are adding color or other add-ins to the resin, it is important to mix these thoroughly into the resin before pouring. Use a clean stir stick to mix the color or add-ins into the resin.
- Pouring the Resin: Once the resin is mixed and any color or add-ins are added, it is time to pour the resin into the molds. Pour the resin slowly and carefully, making sure to avoid bubbles. Use a heat gun or blowtorch to remove any bubbles that may form.
It is also important to wear appropriate safety equipment, such as gloves and a respirator, when working with resin. Resin can release harmful fumes during the curing process, so it is important to work in a well-ventilated area and follow the manufacturer’s instructions carefully.
Resin Crafting Techniques
Resin crafting is a versatile and creative process that offers a wide range of techniques to create unique and personalized pieces. The various techniques include embedding, layering, casting, creating resin jewelry, and creating resin home decor items.
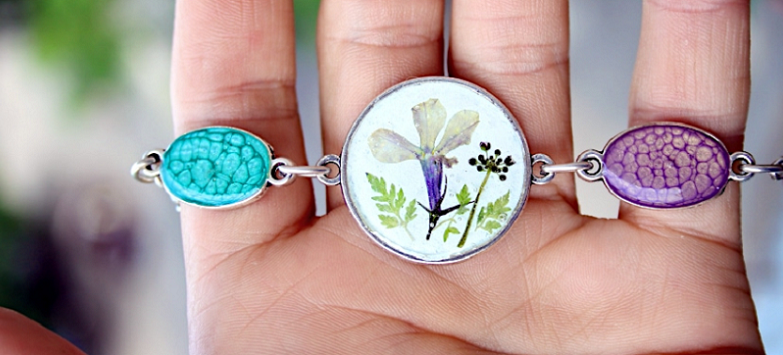
Embedding is a technique that involves placing small objects, such as dried flowers, beads, or small charms, into the resin before it sets. This creates a three-dimensional effect and adds visual interest to the piece. Layering involves pouring multiple layers of resin into a mold to create a layered effect.
Different colors or add-ins can be added to each layer to create interesting patterns or designs. Casting involves using a mold to create a three-dimensional object, such as a figurine or paperweight. The mold is filled with resin and allowed to cure, creating a durable and glossy finish.
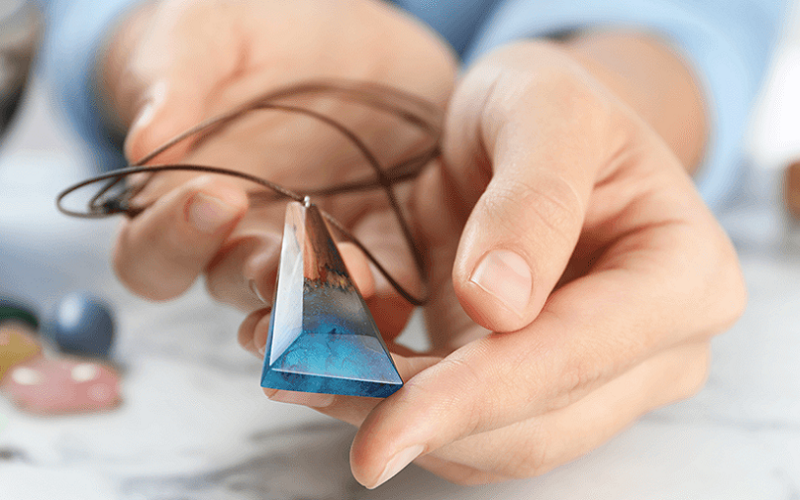
Creating resin jewelry involves using resin to create a wide range of jewelry pieces, including earrings, necklaces, bracelets, and rings. Jewelry can be made by pouring resin into molds or by using wire to create shapes that are then filled with resin. Resin can be mixed with various pigments, mica powders, and other add-ins to create unique and beautiful colors for the jewelry pieces.
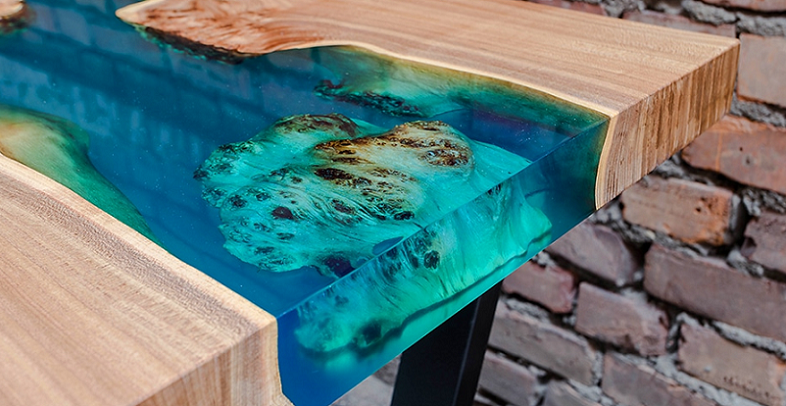
Resin is also used to create a variety of home decor items, such as coasters, photo frames, and decorative bowls. These items can be created by pouring resin into molds or by using a flat surface to pour the resin onto and then shaping it as it cures.
The possibilities for creating home decor items with resin are endless, as the resin can be mixed with various pigments, glitter, and other add-ins to create beautiful and unique designs.
When using any of these techniques, it is important to follow the manufacturer’s instructions carefully and use proper safety equipment. Resin can release harmful fumes during the curing process, so it is important to work in a well-ventilated area and use a respirator when needed. It is also important to wear gloves when handling resin to avoid skin contact.

Curing and Finishing Resin Projects
Curing and finishing are critical steps in the resin crafting process that ensure the resin has fully cured and the finished piece has a smooth and glossy finish. Curing time varies depending on the type of resin being used, and it is important to follow the manufacturer’s instructions regarding curing time as this can affect the final appearance and durability of the piece.
Once the resin has cured, the piece can be removed from the mold. It is important to follow the manufacturer’s instructions for demolding, as some molds may require a release agent to be used before demolding.
Sanding and polishing are also crucial steps in achieving a smooth and glossy finish on the resin piece. The first step is to sand the piece with a fine-grit sandpaper, starting with a lower grit and gradually moving to a higher grit. Once the piece is sanded, a polishing compound and a soft cloth can be used to buff the surface to a high shine.
If the resin piece is being used for jewelry, findings such as earring hooks or necklace chains can be added to the piece. Follow the manufacturer’s instructions for adding findings, as some may require glue or other adhesives.
If the resin piece is being used for home decor, it can be displayed in various ways. Coasters can be used to protect surfaces from water rings, while decorative bowls can be used to hold small items such as jewelry or keys.
In addition to these steps, it is important to handle the resin piece carefully to avoid scratches or other damage. Resin is durable, but it can still be damaged if handled improperly. When storing resin pieces, it is important to keep them in a dry and cool place to avoid damage from heat or moisture.
Troubleshooting Common Resin Crafting Problems
Resin crafting is a rewarding hobby, but it can also be frustrating when things don’t turn out as planned. Here are some of the common problems that can arise when working with resin and how to troubleshoot them:
- Bubbles: Bubbles can form in the resin when it is poured, creating an uneven and unattractive finish. To prevent bubbles, it is important to mix the resin thoroughly and slowly pour it into the mold. Use a heat gun or blowtorch to remove any bubbles that do form.
- Cloudy or Hazy Finish: If the resin finish appears cloudy or hazy, it may be due to incorrect mixing or incorrect ratio of resin to catalyst. It is important to follow the manufacturer’s instructions carefully to ensure accurate measurements and proper mixing.
- Sticky or Tacky Finish: If the resin finish is sticky or tacky to the touch, it may be due to improper curing or incorrect ratio of resin to catalyst. It is important to allow the resin to cure for the full recommended time and to follow the manufacturer’s instructions carefully.
- Yellowing: Over time, resin can yellow or become discolored. This is often due to exposure to UV light. To prevent yellowing, store resin pieces in a dark and cool place and avoid displaying them in areas with direct sunlight.
- Cracks: If the resin piece cracks or breaks, it may be due to insufficient curing time or incorrect mixing of the resin and catalyst. It is important to allow the resin to cure for the full recommended time and to mix the resin and catalyst thoroughly.
- Uneven Color: If the resin piece has an uneven color, it may be due to improper mixing of pigments or add-ins. It is important to mix pigments and add-ins thoroughly into the resin before pouring to ensure an even color.
